Monday, November 22, 2010

Christmas Quiche

Our family just got back from a trip to Disneyland!
We were there for 5 days and we had a BLAST!
We are looking forward to our next trip ... which will be in 10 weeks!
Annual Passport Holders BABY!

Anyway...the recipe this week is a favorite in my house!
We call it Christmas Quiche because we have it EVERY YEAR
for Christmas breakfast. That, and homemade hot chocolate.
Well, when I was younger, it was homemade hot chocolate,
now it's just store bought. Maybe this year!

It is a great recipe. It gives you all the essential breakfast items in one easy dish!
It is a little lengthy in the cooking process, but it is easy to put together!

Christmas Quiche

32 oz bag frozen hash browns
1/3 cup butter, melted
6 eggs
1/3 cup milk
1 green pepper, chopped*
1 onion, chopped*
1 cup diced ham*
6 strips bacon, cooked until crumbly*
1 cup cheddar cheese, shredded
1 cup swiss cheese, shredded
salt and pepper

*Let me start off by saying...the above ingredients can be optional.
The original recipe that we started with only called for ham.
I got a little creative one day and threw some bacon in it too.
Then, some time later, I decided that pepper and onion might be fun.
If you want to buy the hash browns with the pepper and onion already in it, that is another option.

So, let's start.
Preheat oven to 375*
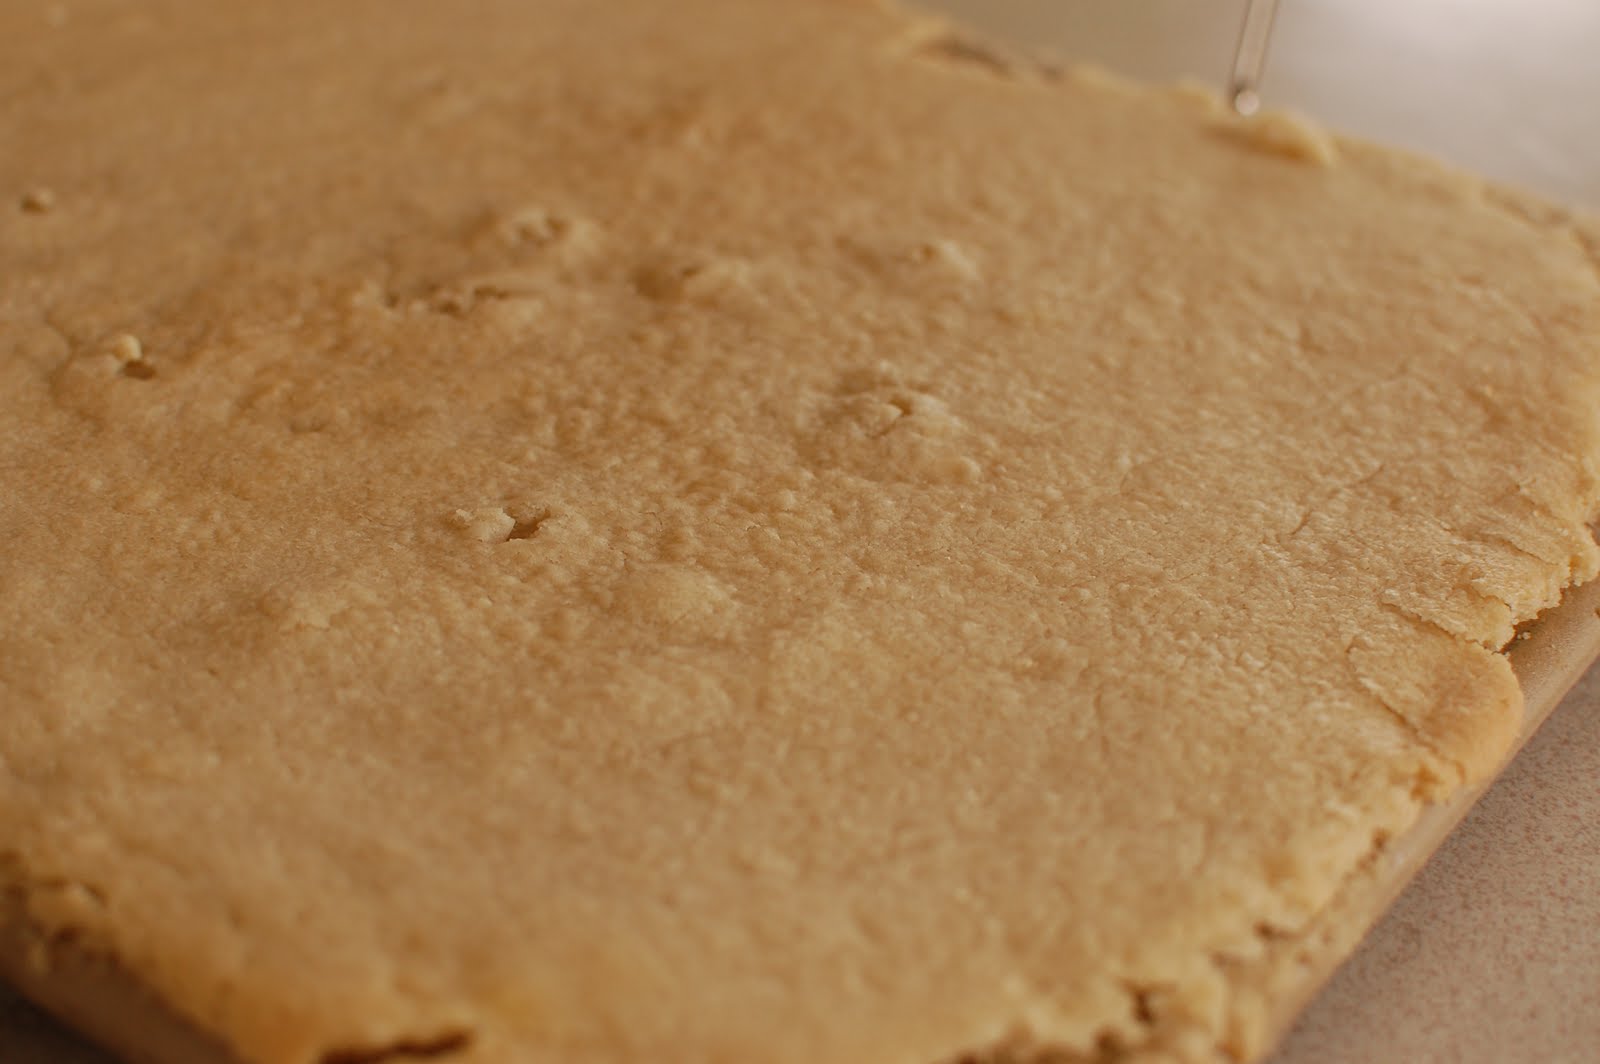
In a greased 9 x 13 pan, spread evenly the hash browns.
(They can either be frozen or thawed...no difference.)
Drizzle butter over the top.
Salt and pepper hash browns.
Cook for 25 minutes.

While that is cooking, you need to start preparing the toppings.

I like to saute my peppers and onions.
Then I like to brown my ham. I know it's already cooked...I know!

When the hash browns are cooked, lower temperature on the oven to 350*.

Sprinkle all the meat/vegetable toppings on top of hash browns.
Stir it a little bit to incorporate throughout the hash browns.

Mix the 6 eggs and milk. Whisk and salt and pepper.
Sprinkle the two cheeses on top of the hash browns, meat/vegetables
and then pour egg mixture evenly over cheese.
Bake at 350* for 30-35 minutes.

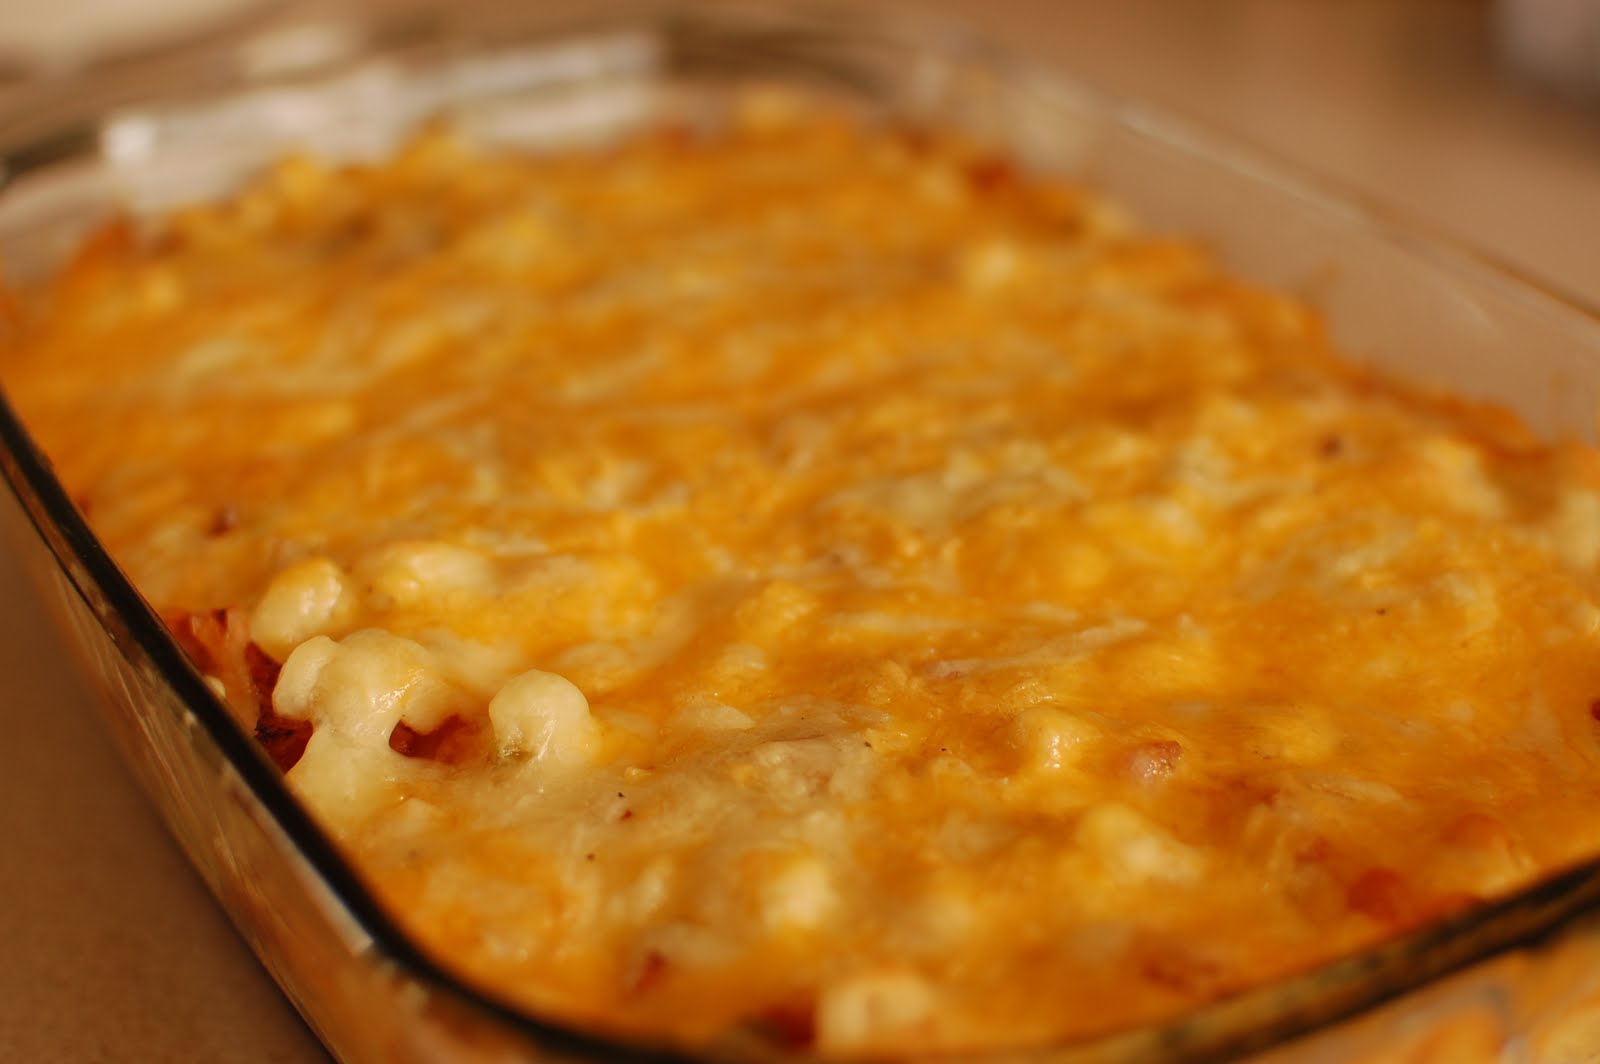
Delicious melted cheese goodness!

Top with your favorite hot sauce, katsup, or service with some orange juice!
This is a great breakfast, or dinner.
It's very easy to prepare all the items the night before and just
throw them together in the morning.
Let me know what you think if you try it!

Thursday, October 28, 2010

Taco Soup

Here it goes...my first 'non-dessert' post.
I hope you like it.
It's a family favorite around our house.
It's one of the things I use my bottled crushed tomatoes on...
which, by the way, I didn't get as many as I would have liked,
because my garden SUCKED this year!
I got a total of about 15 tomatoes!
Not nearly enough for me!
This recipe is really easy and it is really GOOD!
And...does it count if it is a recipe from my Grandma?
Taco Soup
1 lb hamburger, browned and drained
1 quart crushed tomatoes
1 8 oz can tomato sauce
3 cups water
1 envelope taco seasoning
1 can kidney beans (rinsed)
***for this time around,
I omitted the kidney beans
and I added:
1 can black beans (rinsed)
1 can corn (drained)
(really you can do whatever! the possibilities are ENDLESS!)
Combine all ingredients in a large pot
Simmer for 20 minutes
Garnish with:
Frito chips
Cheddar cheese
Olives
Sour Cream
Guacamole
Tomatoes
Green Onion
It really is a good standby to have on hand...
especially now that the weather is getting colder!
BOOOO!

Monday, October 18, 2010

Sticky Buns

I was craving something sweet....
I WANTED to make my
Orange Bubble Loaf bread....
but then I remembered my sister's recipe of these
and thought i'd check it out to see if it was easier than the orange stuff.
It was.
SO EASY.
(I'm all about simplifying lately!)
AND
they were delicious!
They are easy for making the night before for a great breakfast treat.
OR
making in the morning for a mid morning snack
Whatever suits your fancy!
They really are tremendously easy!
Give them a try!
(I do need to warn you, these pictures were not under the best of circumstances)
STICKY BUNS

18-24 Rhode's rolls
1 3oz pkg cook & serve butterscotch pudding
1/2 cup brown sugar
1/2 cup butter
1/2 cup nuts, if desired
(I decided to add pecans AFTER I had started!)
I let my dough thaw just enough to cut them in half.
I wanted to cut them in half so that there were actually more BUNS!
In a greased bundt pan,
(i'm sure a bread loaf pan would work as well)
(you just might need 2!)
arrange half of the rolls in one layer.
Sprinkle some of the dry pudding.
If you are going to add nuts, sprinkle half on at this point as well.
(Like I said, I decided to add some AFTER!)

Add a 2nd layer of rolls, sprinkle the remaining dry pudding mixture.
And nuts!

In a small sauce pan, melt butter and brown sugar.
Mix together until butter and sugar are combined.
Pour over prepared rolls.

Now, depending on the time of day...you need to follow the appropriate directions!
If you are making these at night for the morning, you would cover them with plastic wrap and put them in the fridge.
If you are making them in the morning, you would leave them out and let them raise
until double in size, then cook.
It's really up to you!
Heat oven to 350*
Cook for 30 minutes.

Once out of the oven, turn the pan over onto a plate or pan
and allow the gooey goodness to run out and soak the buns!
Make sure you let them cool or else you WILL burn your mouth!
Delicious!
Let me know if you try them!
Or if you have any other takes on the recipe.
I'd love to hear them!
p.s. I just realized with all the references to "buns" in this post, i'm probably going to get a lot of spam comments about viagra! What was I thinking?!?!
haha!

Saturday, October 16, 2010

New recipe on Monday!

Just wanted to get the word out there...
I will have a new post on monday...and possibly another one later that week!
I have 3 sitting on the burner right now...
it's just I now have to find the time to get them posted!
I'm kinda nervous about starting again....
EEEKKKKKKKK!
See you all Monday!

Saturday, September 25, 2010

I have a question.

And no, I am not dead.
Sorry I've been gone so long.
It's just life..and it kinda comes at ya!
Been through some struggles.
But I think i'm close to coming back.
I do have a question for you though....
Obviously you are still looking
(maybe)
at my blog.
The name is Grandma's Desserts.
I did that because I was going to just post desserts,
and i'll be honest with you....
It's hard to do JUST desserts when you are trying hard
to stay in shape, and lose weight, and help your husband to lose weight too.
So, my question to you....
would you be offended if I added other recipes to this blog?
Would it make sense?
It is a dessert blog after all.
If I did, what recipes would you like to see?
Breakfast? Dinner? Appetizers?
(cuz I did add that some time ago...but that never really went anywhere)
Please let me know what you would like to see...
and thanks for all the comments that you have made these last
oh...crap!
4 MONTHS!
Yikes, that has been a long time!
Hopefully we will see you soon!

Friday, May 28, 2010

Cookie Treat

This dessert was extremly close to one of my favorites.
I was a little nervous because it calls for the dreaded tube of cookie dough.
But I think it turned out ok.
One day I hope to conquer that tube of cookie dough.
We just don't get along right now!
I hope you guys give this recipe a try, I think it's worth it!

Cookie Treat
1 tube sugar cookie dough (or other dough if desired!)
1 lg box instant chocolate pudding
1 pint half and half
1 8oz cream cheese, softened
1/4 cup sugar
1 tsp. vanilla
1 candy bar (heath or any other)
Preheat oven as directed on cookie dough tube

(the tube and I weren't even getting along well enough for him to be in my picture!)
In a greased cookie pan, press cookie dough evenly and bake as directed.
Make sure that the center is done. Oh how I hate this tube!

Be glad there is even a picture....ugh!
In a seperate bowl, combine softened cream cheese, sugar and vanilla.
Spread over cooled cookie.

Combine pudding and half and half.
You must use half and half, it's what makes the pudding thick enough to stay on this sucker!
Pour over cream cheese mixture.
Top with crumbled candy bar.
(obviously, mine isn't a candy bar. I had forgotten to pick one up at the store...so I improvised!
As I am sure you could too!)
It really is a yummy little treat!
It doesn't hold too well overnight, so make sure it will be eaten the day you make it!
I'm so glad summer is almost here...I have a ton of ice cream recipes.
It's just been too cold to make them!
I hope I haven't lost all my readers.
Stay tuned,
I promise to have more recipes!

Friday, April 23, 2010

Strawberry Cheese Trifle

This is another recipe that my Grandma made for our family.
She finds the best recipes.
The original recipe called for canned cherry pie filling.
And that was how I had it the first time.
I was really wanting to do raspberries this time,
but couldn't find a single fresh raspberry anywhere.
So, I settled for strawberries, which wasn't too bad either!
I just made an envelope of junket to make it "pie filling" worthy.
So, go ahead and make it however way you would like!
But if anything...
I suggest you make it.
It will be worth it!
Strawberry Cheese Trifle
(The original name is Valentine Cherry Cheese Trifle)
1 8 oz pkg cream cheese
1 14 oz can sweetened condensed milk
2 cups heavy whiping cream, whipped and sweetened
1 tsp almond extract
1 prepared angel food cake
* 2 21 oz cans cherry pie filling
* 2 pkg fresh strawberries & 1 envelope Junket
* 4 pkg fresh raspberries & 1 envelope Junket
* whichever fruit you decide on!
Grab your trifle bowl, go ahead and get it out of the hall closet
and get it dusted off, because you are going to need it!
(Oh wait, that's just me? oh, ok!)
First of all, make sure you make that whipped cream!
Also, if you are doing the junket method...make that ahead of time as well,
as it needs time to cool.

Take the prepared angel food cake and cut it into 1-inch pieces.
I TRIED to use the entire cake, but you will see that I shouldn't have.
Perhaps my trifle bowl is a little small?
I don't know, it just didn't all fit!
So, my suggestion?

Layer the pieces of angel food cake in a single layer on the bottom of the trifle bowl.
Next, in a seperate bowl, combine the cream cheese and can of sweetened condensed milk
and beat until smooth.
Stir in the almond extract and then half of the prepared whipped cream.
Spread half of the cream cheese mixture over angel food cake pieces.
Top cream cheese mixture with half of the pie filling.

Now you are going to repeat those layers again!
The recipe calls to top the trifle bowl with the remaining whipped cream.
Uh, yeah...mine didn't fit!
I just did a dallop of whipped cream on each individual serving...
which was HUGE by the way!
It's fun and pretty and went perfect with the dinner I made for my in-laws.
Let me know if any of you try it with the raspberries.
I'm curious to know if I am going to have to make this one again.
And I say 'HAVE' to make it again with a smile on my face!

Monday, April 19, 2010

Fruit Pizza BITES

I was blog hopping and I discovered this recipe on
bloom
and I realized that it would be perfect to take
for a couples date night with some friends!
I love fruit pizza...and I thought that these would be fun...
they are miniature-little pizzas....
and we all know how much I like the littler portions...
(makes you think they aren't as fattening!)

I have to tell you, I have never seen a recipe for the cream cheese part
that calls for lemon juice.
I thought it was perfect...paired with the fruit.
It really is worth it to make these...
although if your kids will let you get through frosting them before eating them all..
or BEGGING you for "just one mom, pllleeeeeeaasssssssseeeeeeee!"

Give it a try...especially since fruit is in season,
the weather is nice.
It will make you wish for summer that much quicker!

Fruit Pizza Bites
(from a place to bloom)


1 (16 oz) Pillsbury sugar cookie dough roll
1 (8oz) package cream cheese
1/3 cup sugar
1/2 tsp vanilla extract
2 tsp lemon juice
AND ANY FRUIT YOU WANT!
For mine, I used:
strawberries
blueberries
raspberries
Preheat oven to 325*.
Slice the cookie dough pretty thin,
trying to do it as thin as you can without it crumbling.
(I'm really not good with measurements)

Place onto a greased cookie sheet and bake for 7 - 8 minutes.

Allow to cool.
In a seperate bowl, combine the cream cheese, sugar, vanilla, and lemon juice.
Mix until combined and creamy.
Spread onto cooled cookies.
You can go pretty liberal, there is enough cream cheese for all these babies!
Decorate with fruit as desired.

Hopefully this nice warm weather will make me want to start baking again!
Sorry I have been a slacker.
I just can't get into it.
Thanks for supporting me though.
Look for more recipes to come!

Thursday, April 1, 2010

Banana Bars

Sorry it's been so long since i've posted.
It's amazing how fast life can get away from you.
I've been working extra at work...
a little potty training of my son (done in a week! YAHOO!)
a random and rare sunny day that caused sunburn that I took FULL advantage of!
Yeah...all the sudden it had been a week and I hadn't baked ANYTHING
Well, i'm back with a few recipes.
Hopefully with spring coming up
(hopefully it will stop SNOWING for spring to come)
I'll be able to get that baking inspiration again!
This banana bar recipe I have been waiting for since Christmas time
from my husbands aunt.
It is so good...i've had requests from work to make it again!
Anytime you have some bananas that are about ready to turn,
try this one on for a change!
I don't think you'll be disappointed!
Banana Bars
1/2 cup butter, softened
1 1/2 cups sugar
2 eggs
1 cup sour cream (I used light and it was fine)
1 tsp. vanilla
2-3 mashed ripe bananas
2 cups flour
1 tsp baking soda
1/2 tsp salt
Preheat oven to 350*
In a large bowl, cream together butter, sugar and eggs.
In a seperate bowl, mash the bananas.


I just used my pastry blender...i'm sure a potato masher would work just as well.
Add the mashed bananas, vanilla and sour cream.
Combine.
Mix the dry ingredients together and then add to the banana mixture.
Pour into a greased jelly roll pan.

Bake for 20-25 minutes.
It will be just as light as the unbaked mixture above!
Top with a cream cheese frosting....which I forgot to take a picture of....sorry!
FROSTING:
1 8 oz pkg cream cheese ( I did NOT use light!)
1 cube of butter
2 tsp vanilla
4 - 5 cups powdered sugar (I used 4)
Mix together butter, cream cheese and vanilla.
Add powdered sugar until it reaches the consistancy you like.
Frost bars and I dare you not to eat them all!

Happy Easter/Spring Break/Winter?

Thursday, March 18, 2010

Island cookies

Yet another example of all the DIFFERENT cookie recipes.
This one was pretty good.
A fun little cookie with some nuts and coconut added.
I toasted my coconut....
check out this post for a reminder on toasting coconut.

Island Cookies

1 2/3 cups flour
3/4 tsp baking powder
1/2 tsp baking soda
1/2 tsp salt
3/4 cup butter, softened
3/4 cup packed brown sugar
1/3 cup white sugar
1 tsp vanilla
1 egg
1 pkg chocolate chips
1 cup coconut, toasted if desired
1 cup chopped nuts
Preheat oven to 375*

Combine flour, baking powder and soda, and salt in a small bowl.
Beat butter, brown sugar, white sugar and vanilla until creamy.
Beat in egg.
Slowly combine flour mixture.
Stir in chocolate chips, coconut and nuts.

Place onto cookie sheet with your favorite scoop!
Bake for 8 to 11 minutes.
Allow to cool on cookie rack.

Monday, March 15, 2010

Mint Brownies

Here's a *green* recipe to help you with your
St. Patrick's Day celebrations!
Mint Brownies
2 cups flour
2 cups sugar
1/2 c. buttermilk***
2 eggs
1/2 tsp. baking soda
1 tsp vanilla
1 cup margarine
5 tbsp. cocoa
1 cup water
Preheat oven to 350*
***if you do not have buttermilk, NEVER FEAR! I have a shortcut for that!
***To make buttermilk, measure 1 tbsp lemon juice, and then add enough milk
to make 1 cup total liquid. Let sit for 5 minutes.
This recipe calls for 1/2 cup buttermilk, so I assume you could do 1/2 tbsp lemon juice
and then finish with enough milk to make 1/2 cup liquid.***
(I say assume, because I didn't actually do it. I made the 1 cup total mixture)
In a large bowl, combine flour and sugar.
In a seperate bowl, combine buttermilk, eggs, baking soda and vanilla.
Combine and set aside.
In a small sauce pan, melt margarine and add cocoa and water.
Bring all ingredients to boil.
Once boiling, remove from heat. Set aside.
Combine the buttermilk mixture with the flour and sugar.
SLOWLY add the chocolate mixture...we don't want to cook the eggs!
Pour into a greased cookie sheet and bake for 10-15 minutes.
Until the center is done.

Allow to cool completely!
Mint Frosting:
2 cups powdered sugar plus extra if needed.
1/2 cup margarine, softened
2 tbsp milk
1/2 tsp peppermint extract
2-3 drops of green food coloring

In a seperate bowl, combine all ingredients and mix with beater until
ingredients are smooth.
Add extra powdered sugar if needed to get the consistancy desired.
Spread on top of COOLED cake.
For chocolate topping:
Melt 6 tbsp margarine and 1 cup milk chocolate chips.
Drizzle across brownies.

Yeah, I got distracted and my chocolate cooled a bit too much...
so it didn't exactly DRIZZLE...but that's ok...right?

Saturday, March 6, 2010

Pudding Cookies


Check me out here


for my guest post!
Thanks Vanessa!

Tuesday, March 2, 2010

"Layers of Love" chocolate brownies

This recipe is from the Nestle brand cook book.
They looked intriguing...so I thought I'd take a shot at them!
They were really pretty good...
and all the goodness stuffed in the middle was excellent!
The name could stand to be changed...just a tad bit!
Oh well.
Layers of Love Chocolate Brownies
3/4 cup flour
3/4 cup cocoa
1/4 tsp salt
1/2 cup butter, softened
1/2 cup sugar
1/2 cup brown sugar
3 large eggs
2 tsp vanilla
1 cup chopped pecans
3/4 cup white chips
1/2 cup caramel topping
3/4 cup chocolate chips
Preheat oven to 350*
In a large bowl, beat butter and sugars until creamy.
Add 2 eggs, one at a time until mixed well.
Add vanilla.
Gradually mix in dry ingredients.
Reserve 3/4 cup batter.
Spread remaining batter into greased 8 x 8 pan.
Sprinkle with the pecans and white chips.

Drizzle caramel topping over nuts and chips.

Beat the other remaining egg into reserved batter.
Stir in chocolate chips.
Spread evenly over the caramel goodness!

Bake for 30 to 35 minutes.
Cool completely before serving.

Thursday, February 25, 2010

Toffee Chip Cookies

I can't believe how many different cookie recipes there really are out there.
This one is from my sister....
and it has almost everything from your pantry in it!
It's a fun little cookie with a different kind of taste!
Give it a try and let me know what you think.
TOFFEE CHIP COOKIES
1 cup butter, softened
1/4 cup oil
1 cup sugar
1 cup brown sugar
1 tsp vanilla
2 eggs
3 cups flour
1 tsp baking soda
1 tsp salt
3/4 tsp cream of tartar
3 cups rice crispy cereal
1 cup oatmeal
1 cup coconut
1 cup chocolate chips
1 cup chopped nuts
1 cup toffee chips
Preheat oven to 350*

In a BIG bowl,
cream together butter, oil, both sugars and vanilla.
Add eggs, flour, baking soda, salt and cream of tartar.
Next, add all the lovely *adds* to your cookies.

Using your desired size *scoop* place dough on parchment paper covered cookie sheet
and bake for 10-12 minutes.
Allow to cool.
Also, just an FYI..
I got 120 small cookies out of this batch.
I'll leave it up to you if you want to half it or brave it!

Monday, February 22, 2010

Chocolate Marshmallow Brownies

Another tried and true recipe from my Grandma Travis.
There was a time that we would request these for EVERY family party.
Our family LOVES these marshmallow-y goodness!
And it is oh.so.easy to make also!
Chocolate Marshmallow Brownies
2 cubes margarine, softened
2 cups sugar
1/3 cup cocoa
2 tsp. vanilla
4 eggs
1 1/2 cups flour
1 1/2 cups nuts (optional)
bag of mini marshmallows
Preheat oven to 350*

Mix sugar and margarine until smooth, then add cocoa and vanilla.
Once combined, add eggs, one at a time, beating well after each egg is added.
Add flour and nuts.
Spread batter on a large greased cookie sheet.
The batter will be kinda stiff....that's a good thing!

Bake for 25 minutes.
Remove from oven and immediately cover with a 10.5 oz bag
of mini marshmallows.

Bake for an additional 3 minutes.
Remove from oven.
The marshmallows are just fluffy and big now!
Allow them to cool completely.
Make the frosting while the brownies are cooling.
FROSTING:
1/2 cup butter
1/4 c cocoa
1/3 cup canned milk
Powdered Sugar (approximately 2 cups)

In a small bowl combine all the ingredients and add the
powdered sugar until the frosting is to the desired consistency.
If you serve them the day you make them...
you will have the sticky marshmallow goodness.
If you wait a day, the marshmallows won't be as sticky.
Either way.....DELICIOUS!